Showing posts with label tutorial. Show all posts

Tuesday, July 9, 2013

Tutorial: Madeline Poole Inspired Flowers

Hey guys,

So I posted my Madeline Poole Flowers mani about a week ago and I thought I would do a tutorial on them for you all.  It is a great nail art design for beginners and they look so cute!   The only supplies you will need are a few polishes a dotting tool, and a nail art brush.


Colors used:  Sally Hansen Complete Salon Manicure Without a Stitch, Essie In the Cab-ana, First Timer and Mojito Madness, China Glaze White On White and Sally Girl Get Out!


Step One:  Paint your nails a base color, I would suggest a white, off-white or a nude.  Pick two colors for your flowers, a white for the middle of the flower and a green for the leaves

Step Two:  Give your base color 30 minutes to dry or apply a quick dry topcoat and wait about 5 minutes. Pick one of your flower colors place a drop on a piece of paper and grab your dotting tool.  Make little half circles in a two to four spots around your nail, make sure you space them well so that you can fit the other side of your flower on in a minute.

Step Three: Grab your other flower color and do a half circle on the other side of the half circles you just did to make a little flower shape.  These do not have to be perfect looking.

Step Four:  Grab your white and with your dotting tool place a small dot in the center of your flowers

Step Five:  Get your green polish and your nail art brush and paint small leaves around your flowers, I did two leaves for each flower.  These again don't have to be perfect, I am not great at drawing leaves as you can see.

Step Six: Wait about 5 minutes and apply a quick dry topcoat, I would recommend Seche Vite because it will not smear your design


Oh and I did an accent nail as well, this is a coat of In the Cab-ana and Sally Girl Get Out! (fyi in love with this glitter!)


Sunday, July 7, 2013

Tutorial: Multi-Colored Water Spotted Nails

Hey guys,

So I did a multi-color water spotted mani a week or two ago and when I posted it on Beautylish someone suggested that I do a tutorial for it.  I thought this was a pretty good idea because I haven't seen any out there for using more than one color in a water spotted mani.  If you have never done a water spotted mani or would like to see a video on how it is done then please visit CutePolish on YouTube.  I hope you all find this helpful!


Colors used: Orly Pure Porcelain, Sally Hansen Xtreme Wear Pacific Blue and Twisted Pink, and Wet N Wild On A Trip


Step One:  Paint your nails a base color, I would suggest a white or off-white for this.  Also apply a little Vaseline or some tape around your fingers to help aid in clean up later.

Step Two: Get a cup a fill it to the top with room temperature water, make sure it is a cup you are not going to be drinking out of again. Oh and do not use a Styrofoam cup the nail polish will melt it! Pick three  colors for your water spots.  Now take one of the colors drip a dot of polish onto the surface of the water.  Spray it with some kind of alcohol based spray about 4-5 inches away (you can use body spray, anti-bacterial spray, hairspray).  I usually spray between 1-3 times, it depends on how well the polish start to separate.

Step Three: Repeat step two with your other two colors.  

Step Four:  Remove the tape or wipe the Vaseline and nail polish off your skin and clean up any other polish with a q-tip or brush and some acetone.  Top coat your look and you should be done!

A couple of tips if you have never done water spotted nails before.
1.It can be a bit tricky to do at first, I find that I like to only work with one drop of polish, especially when doing more than one color for the spots.  I also find that when I do more than one drop it seems to not want to separate once I spray the body spray. 
2. And on the topic of body spray I would highly suggest you do not use aerosol hairspray, I have tried it once and the spray was too powerful it pretty much blew the nail polish out of my cup of water.  
3. It is important that the water you use is room temp, if it is too cold the polish dries very quickly and you will have issues with getting it to spot.


Sunday, June 16, 2013

Impressionist/Abstract Flowers Tutorial

Hey guys,

So while updating my blog and changing the name and everything I realized I don not have enough tutorials!  I figured I would start with my abstract/ impressionist flowers that I have done a few times.  These are actually very easy to do and are pretty much mistake proof.  You will need pure acetone, some kind of small glass container to put some acetone in, a small nail art brush, a white or off-white base, three "flowery" colored nail polishes, a green and some topcoat.  

Colors used:  base- Orly Pure Porcelain, flowers- China Glaze Dance Baby & Fuchsia Fanatic, and Sally Hansen Xtreme Wear Coral Reef, leaves- an unnamed Creative Arts green  (dupe to Color Club Twiggie)


Step One: Paint your nails a white or off-white base color and then apply a fast drying topcoat.This is important because we will be using acetone to make the flowers and the topcoat creates a barrier so we don't lift any of the base coat off as we are painting the flowers.

Step Two: Pour some acetone into your glass container and put a drop of one of  your flower colors onto a paper plate.  Dip your nail art brush into the acetone and then mix it into some of the polish you put on the plate, you want the polish to be pretty thinned out by the acetone so you may have to dip the brush back into it a few times to get enough.  Once you mix the polish and acetone begin painting flower like shapes onto your nails.

Step Three:  Continue painting your flowers with the other colors you have chosen, it really doesn't matter if you do perfect looking flower shapes, after the first color I really just kinda haphazardly place the color onto the nail in different spots to balance the look out.

Step Four: Grab your green polish and again thin a blob of it with your acetone and paint it anywhere you have open spaces on the nail.  I would try to avoid overlapping it with the flower colors as much as you can because it can make them look a little muddy. Once you have finished with the leaves you can apply your topcoat.  I like to do the topcoat pretty much right after I am done because it helps to blend the colors even more and gives it a more impressionist style look.

A couple of tips, you should not need very much polish for the flowers and leaves, using the acetone helps because even if the polish gets a bit thick you can still use it since you are thinning it with acetone.  The polish should not be opaque when you are painting the flowers and leaves it should look like watercolors.  If you do feel that you made a mistake you can take your brush and wash it off then dip it into the acetone a lightly brush wear you have messed up and it should take the polish off without removing your base color.

I hope you all like this tutorial and if you have any questions please feel free to leave a comment or e-mail me!


Monday, May 6, 2013

Tie Dye Nails Tutorial

Hey guys,

I have a tutorial finally!  A couple of weeks ago I posted my Neon Sponging mani and I decided to do a tutorial on it.  I ended up calling them tie dye nails, that is what this technique I think looks like when it is finished and neon sponging was just not such a great name. This is also almost identical to the technique I used for my Thunderstorm Nails the only difference is that in the thunderstorm one I made sure to leave some of my base color showing.  


Products used
Base: OPI My Vampire is Buff
Tie Dye Colors: Color Club Volt of Light, Color Club Pure Energy, and Finger Paints 15 Minutes of Frame
Glitter Top Coat: Is a franken I made with a couple of glitters from Sallys Girl but it is very similar to Sinful Colors Hottie


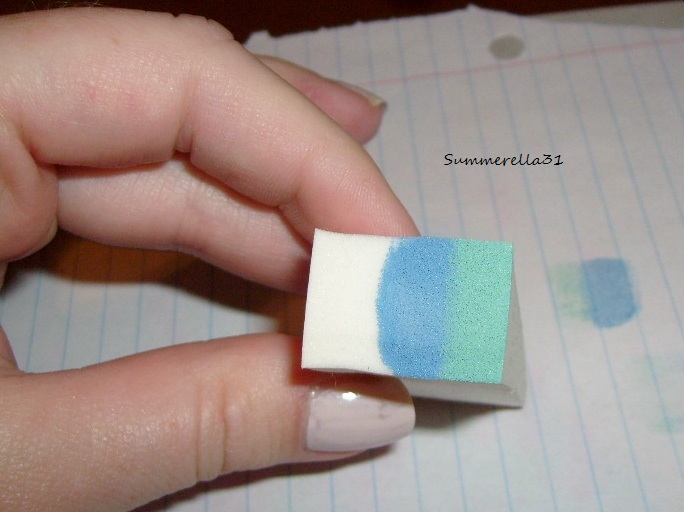
Step One: You will need 3 different colors, I used neons but any 3 colors will work.  I would recommend colors that will blend together well though. So choosing something like two primary colors and then their secondary color like I did with the yellow, blue and green.  Pink, yellow and orange is another example that would work beautifully.  Next cut up a sponge (really any sponge will work I used the one from my China Glaze Ombre set for this one) make sure the pieces are fairly small so you don't cover your whole nail with one color.  I also would advise using tweezers to hold the sponge since the pieces are so small it makes the job way less messy!

Step Two: Apply a base coat, I just used an off-white for my base because it would really allow the neon colors to pop against it.

Step Three: Begin applying your tie dye colors onto the nail.  As you can see I just pounced the sponge onto random spots on my nails.  Make sure you leave enough room for your other colors!

Step Four: Continue applying your other colors onto the nail, as you can see I made sure to leave enough room to lay down my third color.

Step Five: Finish applying your tie dye colors, you can go back over the colors to get the right opacity and to make sure that none of your base is showing through.  Leave the desing to dry for a minute or two and then top it with a glitter top coat of your choice and then a fast drying top coat over that and you are done!


Sunday, October 14, 2012

Feather Tutorial

Alright I finally have another tutorial up for you guys.  This is really pretty simple and I will give you guys some tips and tricks as well.  


I used Orly Shockwave and a white striper polish


Step 1: Choose a base color and paint a couple of coats and let dry for 10-15 minutes
 
Step 2: Paint a diagonal stripe on your nail, it needs to be fairly thin and try to taper it at the tip
 
Step 3: Begin drawing the feather with short strokes making them longer at the base and shorter as you get to the tip of the feather.  It is easier to start farther away and pull the strokes towards your line.
 
Step 4:  Let the design dry for 15-20 minutes and then apply a top coat, careful to not streak your design!
 
 
Now some tips!  Make sure to wipe off most of the polish on the neck of the bottle when doing this design.  Doing this helps you to get more feathery looking strokes which is obviously what we are going for.  Also if you have covered up some of the stem of the feather once you are done you can go back over it a little bit with the striper again.  This design drys pretty quickly because you are almost dry brushing it so it makes for an easy quick nail art design.  Don't worry about every feather looking the same either they will all look different and that is what is so pretty about this look.  Also don't place them all in the same spot on each nail it looks more delicate if the are going in different directions on each nail (see my other feather mani here to get an idea of what that looks like).
 
Hope you enjoy trying these out you can comment or e-mail me if you have more questions about this design.


Thursday, August 16, 2012

Leopard Print Nails Tutorial

Here is the leopard print tutorial I said I was going to do.   Hope you enjoy and give them a try!

I used Orly Pure Porcelain, Color Club Resort to Red, and Amuse Black Nail Art Pen and Striper


Step 1:  Paint your nails a base color

Step 2: Choose a color to do your spots in and dab on several spots on the nail.  You can use any color you want and you can do a bunch of spots in different colors too.

Step 3: With your nail art pen or striper and practice making your spots on a piece of paper.  You want to do sort of wonky half circle or c's.

Step 4: Paint your your c's around the colored spots on your nail, add a few random blotches to fill in empty space.


Now you should be done! 


A few tips:
  • Make sure to wait a good 15-20 minutes before applying a top coat over your leopard print or you risk dragging the design.  Which you can see that I did when I applied my top coat!  I need to be more patient.
  •  
  • Also it really does help to practice drawing those half circles before doing your spots. 
  •  
  • If you want to use a quick dry top coat like Seche Vite, remember to use a regular top coat first over the design. This will help prevent chipping and seals the design better, I find quick dry top coats drag designs more too.


Monday, July 9, 2012

Scribble Nails Tutorial

I have a fun, really easy tutorial for you guys today.  I did this one day just kind of playing around with my nail art pens and I actually liked how it looked.


Step one: start off with a base coat in whatever color and finish you want.  I used China Glaze Gothic Lolita.


Step two: grab a nail art pen to make your scribbles.  I used one that has a striper and a pen in one bottle, but you could use the nail art pens from Sally Hansen or a small nail art brush dipped in polish.


Step three: You pretty much scribble over your nails with the nail art pen.  I told you all it is super easy and pretty much mistake proof.  Once you are finished and happy with your nails wait a few minutes then apply a top coat.  Make sure that the design is somewhat dry if the design is still wet it will streak when you apply your top coat!  The best way to apply the top coat is to get a large blob of it on the end of the brush and move it over the nail without actually "brushing" it on.


You should have something similar to this!

Here is one I tried with a nail art brush.  I used Essie Mojito Madness, Wet N Wild On A Trip and China Glaze Frostbite for the scribble color.  I should have used a smaller brush for this one though it is kind of a fail haha.  But it shows how you can get a different look with a nail art brush.


Wednesday, June 6, 2012

Space Nails

I have another tutorial today, this one is a manicure that looks really cool when done but pretty much anyone can do it.  Galaxy nails or space nails is what I have seen them called.  Read on to see how to get them!


Step 1: Paint your nails with a dark base, I would suggest black or a black that has a blue, purple or green shimmer to it.  I used Wet N Wild Morbid.


Step 2: Choose three or four colors to add dimension to the nails.  I went with neon's but you can use any kind of finish you want. I used Color Club Electro Candy, Volt of Light, and Pure Energy.   Try to use yellow, pink, blue, orange and purple.  Put some drops of each polish color onto a piece of foil (the polish doesn't dry out as fast on the foil) and use a cosmetic sponge to sponge one of the colors on each nail in random spots.  I did the pink first.


Step 3: Sponge on the second color in spots where you did not sponge the first color.  I used the blue next.


Step 4: Take the third color (the neon yellow for me) and apply it to any spots that are still showing the base and to cover up any strange looking areas where the other two colors meet.


Step 5:  Apply a light coat of a finer glitter to the nails and then take a glitter that has larger hexagonal pieces in it.  I used Wet N Wild Hallucinate for the all over glitter and China Glaze Techno for the larger glitters.  Put a few drops onto the foil and take a toothpick and randomly apply a few of the hexagonal glitters to the nails.  After that apply a top coat, clean up any polish around your nails and you are done!


Tuesday, May 15, 2012

Glitter Gradient Nails Tutorial

Here is my glitter gradient tutorial.  This is pretty easy and you don't need any special tools or anything to achieve the look.


Step 1:  Paint your nails with a base color of your choice.  I used Wet N Wild I Need A Refresh-Mint.


Step 2:  Choose a glitter nail polish, you can use one that has really fine glitter or one that has larger pieces in it as well.  I used Milani Jewel Fx Teal glitter for this one.  Wipe almost all of the glitter off of the brush by swipping it on the bottle opening and apply it in downward strokes starting at the tip of you nail and working towards the middle to 3/4 of the way down the nail.  Leave some of the base color at the base of the nail free of glitter.


Step 3:  Apply another light coat of glitter from the middle of the nail to the tip.  This will start to give you the gradient effect we are looking for.


Step 4: Apply the glitter to just the tips of the nails making the tips as opaque with glitter as you can.  Apply a top coat and you are done!


Sorry for the very flashy pics, it's nighttime and I had to use flash indoors.  The gradient looks much more opaque at the tips in real life.  I suggest if you are going to try this for the first time use a finer glitter with no big hexagonal pieces in it because they are a bish to try and get to look right in a glitter gradient!


Here are a couple of examples of glitter gradients I have done before.  I really like to use a more neutral color with these they look really nice.  The first one is OPI Skull and Glossbones with OPI Glow Up Already.  The second is Wet N Wilds Grey Anatomy (fyi I added about 30 drops of black to my Gray Anatomy because it was really sheer before) with Cover Girl City Lights.


Sunday, April 29, 2012

Gradient Nails Tutorial

Here is the gradient tutorial I promised, and I swear it is so easy to do! 


Step 1: The supplies you will need. A makeup sponge, white or off white nail polish for the base, two-five colors of nail polish for your gradient colors a glitter top coat to put over the gradient if you wish and a top coat.  Also work on a piece of paper or some newspaper so that you don't get polish on the surface you are working on and so that you can dab polish off of your sponge.

The colors I have chosen to use are base: Orly Pure Porcelain, gradient colors: China Glaze Electric Beat and Orly Gumdrop, glitter: a mixture of two Sally's Girl glitter nail polishes, top coat: Seche Vite.


Step 2: Paint your nails with one or two coats of your base and then grab your makeup sponge and apply your gradient colors across the sponge.  Tap the sponge onto your paper a few times to get a bit of the polish off.


Step 3: Pounce the sponge with the nail colors onto your nails, you will need to add more nail polish to the sponge after doing two or three nails and I usually apply a few coats of the sponged nail polish onto my nails.  The picture below is after only one application of the sponge and you can see that it will need one or two more passes with the sponge to get the colors opaque and vibrant.  Also note that you really don't need a perfect white base to do this I just choose a base nail polish that is somewhat opaque after just one coat.  This will cut down on drying time and it really isn't necessary for you to have a completely perfect base for this.


Once you have gotten your gradient to the point that you like it the skin around your nails is going to be covered in nail polish!  You could do the tape method that I used for the splatter tutorial but I don't bother with this when I am doing a gradient.  Which brings us to...


Step 4: Cleanup!  You will need some q-tips, pure acetone and a cheap makeup brush or artists brush (mine is a $1 e.l.f. brush from target).  Also the little glass container I have my acetone in is from Sally's Beauty Supply, it is meant for mixing acrylic but works great for pouring a bit of acetone in to clean up your mani's.  I use q-tips first to clean up the larger areas of nail polish from my skin then go back with the brush and make sure all of the extra polish is mostly off of my cuticles and sides of nails.


Now all you have to do is apply your glitter top coat and then seal it all with a quick dry top coat.  Apply some cuticle oil or a cuticle balm to the cuticles and the skin around your nails too so that you don't dry them out with the acetone from cleaning them up.


Wednesday, April 18, 2012

Neon Splatter Tutorial

So I decided to do a splatter mani today and I figured I would go ahead and post a tutorial on it. 

Step one: You will need to lay down some newspaper or something to protect the area where you will be doing your nails.  Choose a base color and 2-4 colors for your splatters.  You will need a straw for each splatter color and some clear tape to tape around your nails so that clean-up is easier.


Step 2: Paint your base color, I chose Orly Au Champagne, I wanted to use white because it would make my neon splatter colors pop.


Step 3: Tape off the area's around your finger so that the nail polish does not get all over your fingers.  Trust me you will want to do this because even with tape the clean-up is no fun.  It is hard to tell from the picture but you want to use the smallish strips of tape and tape just under your nail and on both side getting the tape as close to the nail as you can without covering the nail.


Step Four: Sorry guys didn't get pics of this step!  Basically you pour a small amount of polish onto the newspaper or a paper plate and you dip your straw in the nail polish then blow a quick puff of air into the other end of the straw and onto your nail.  This takes some time to perfect and the splatter is going to vary with each nail.  I work with one color at a time on two nails and then got to the next color and the next.  Don't try to do all five nails on each hand at the same time. It is much easier to tape off two or three nails and splatter those first then remove the tape from them and do the other nails on the hand.  After they have a chance to dry for a bit I applied a Color Club top coat (not sure of the exact name it came with my Electro Candy set and it is supposed to make you nail polish colors more vibrant) then I put a coat of Seche Vite over that.


Your finished result should be something similar to this!