
Here is the gradient tutorial I promised, and I swear it is so easy to do!
Step 1: The supplies you will need. A makeup sponge, white or off white nail polish for the base, two-five colors of nail polish for your gradient colors a glitter top coat to put over the gradient if you wish and a top coat. Also work on a piece of paper or some newspaper so that you don't get polish on the surface you are working on and so that you can dab polish off of your sponge.
The colors I have chosen to use are base: Orly Pure Porcelain, gradient colors: China Glaze Electric Beat and Orly Gumdrop, glitter: a mixture of two Sally's Girl glitter nail polishes, top coat: Seche Vite.

Step 2: Paint your nails with one or two coats of your base and then grab your makeup sponge and apply your gradient colors across the sponge. Tap the sponge onto your paper a few times to get a bit of the polish off.
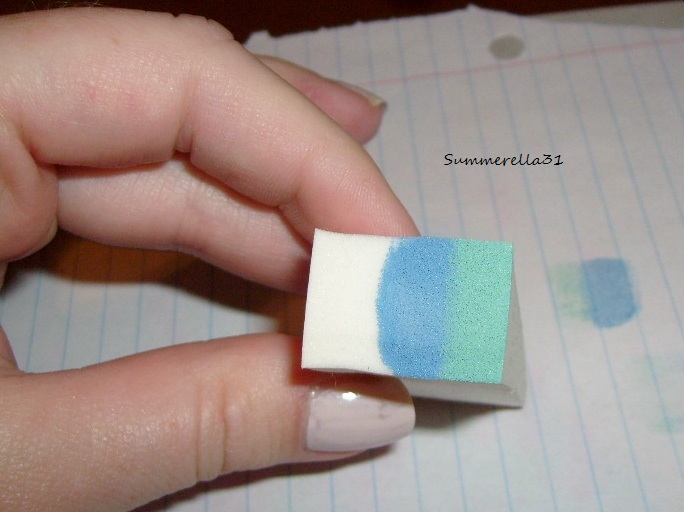
Step 3: Pounce the sponge with the nail colors onto your nails, you will need to add more nail polish to the sponge after doing two or three nails and I usually apply a few coats of the sponged nail polish onto my nails. The picture below is after only one application of the sponge and you can see that it will need one or two more passes with the sponge to get the colors opaque and vibrant. Also note that you really don't need a perfect white base to do this I just choose a base nail polish that is somewhat opaque after just one coat. This will cut down on drying time and it really isn't necessary for you to have a completely perfect base for this.

Once you have gotten your gradient to the point that you like it the skin around your nails is going to be covered in nail polish! You could do the tape method that I used for the splatter tutorial but I don't bother with this when I am doing a gradient. Which brings us to...

Step 4: Cleanup! You will need some q-tips, pure acetone and a cheap makeup brush or artists brush (mine is a $1 e.l.f. brush from target). Also the little glass container I have my acetone in is from Sally's Beauty Supply, it is meant for mixing acrylic but works great for pouring a bit of acetone in to clean up your mani's. I use q-tips first to clean up the larger areas of nail polish from my skin then go back with the brush and make sure all of the extra polish is mostly off of my cuticles and sides of nails.

Now all you have to do is apply your glitter top coat and then seal it all with a quick dry top coat. Apply some cuticle oil or a cuticle balm to the cuticles and the skin around your nails too so that you don't dry them out with the acetone from cleaning them up.


No comments:
Post a Comment