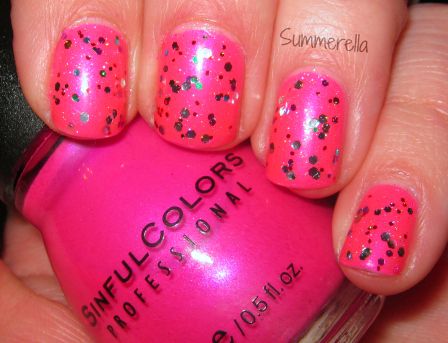
Showing posts with label Neon. Show all posts

Thursday, July 25, 2013

Fan Brush Tie Dye Nail Art

Hey guys,

So I am not really sure what to call these nail at the moment but I am going with fan brush tie dye for right now.  I am in love with this look and it is so simple it is not even funny.  I got the inspiration for this nail design from a dress I had bought for an event at work.  It had a really pretty blue and pink watercolor look in parts of the fabric and it made me want to try for something like it on my nails.  I started with and off-white base and did two coats of that and top coated it.  I let it dry for about ten minutes then I grabbed a pastel neon blue and pink polish, a fan brush and some pure acetone.  I just placed a big drop of the polish color on a paper plate and then I dipped my fan brush into the acetone and thinned out the polish till it got a watercolor look to it.  I then just randomly dapped the thinned polish onto my nails.  I will probably do a more detailed picture tutorial on these soon so I can explain better how I got this look.  I hope you all enjoy!

Colors used: OPI My Vampire is Buff and my past blue and pink neon frankens


Tuesday, July 16, 2013

Floral Nail Art

Hey guys,

So I am super happy today, I just got a new job!  There may not be as many posts coming up since I am starting my new job tomorrow, but I will try and post at least three times a week.  Anyways, today I have some another floral nail art design, I used the same technique as my Hawaiian Style Flowers post.  I love this nail art because it is so easy and requires very little skill to do and it looks really pretty.  Hope you all enjoy.

Colors used:  Orly Pure Porcelain, neon coral, pink and red frankens, Color Club Twiggie, and Orly Lucky Duck


Friday, July 5, 2013

Pastel Neon Orange Franken

Hey guys,

I am wearing another one of my neon franken's again today, I just love these and this orange one is probably one of my favorite next to the purple one that I did.  This color did not one to show up right when I photographed it though!  Really frustrating but it is not a mac and cheese orange, it is a little lighter and leans a tiny bit coral than what is showing in the pics.
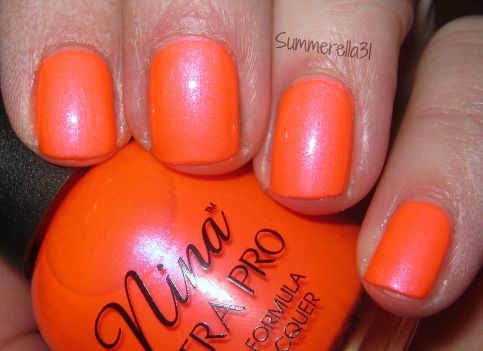

Colors used: neon orange franken and Essie As Gold As It Gets


Flash, this one is way off on color accuracy


Natural light, closer but it's brighter and not as coral as this is showing


Natural light again this is closer than the first pic but it photographed way darker hear than in real life


Thursday, June 27, 2013

Kaboom!

Hey guys,

I have one of the Salon Perfect Neon Collision polishes to show you all today.  This one is Kaboom, it is a dupe for Ninja Polish Floam, it is a neon green and blue matte glitter polish.  I love that a drugstore brand duped such a unique and fun indie polish.  I have wanted Floam for a while but I kinda hate messing with ordering indie polishes so I just avoided getting it.  The Neon Collision collection has a bunch of different neon glitter polishes in different color combos which is great!  I got this one and Shocked (which I will show you all tomorrow probably) because they were the only two polishes that I knew I would personally wear.  When I first tried these out I didn't use a base for them, fyi big mistake, they look a million times better with a        colored polish under them.  I really love the color combo I chose for this one and I can't wait to try more.


Colors used: OPI Did It On Em' and Salon Perfect Kaboom


Saturday, June 22, 2013

Multi-Colored Water Spotted

Hey guys,

So when I tried the water spotted nails the other day I thought that it might be cool to see what it would look like if I did a few different colors.  This one was definitely trial and error, I had a hard time getting the color to spot at first and I was trying to use hairspray but it was not working well.  I figured out that if I did just one drop of the nail color onto the water and then sprayed with body spray I got the polish to separate better.  I did one color at a time and I thought it looked pretty cool once I was done with it.


Colors used: base, Orly Pure Porcelain, China Glaze Electric Pineapple, Sinful Colors Why Not and Bikini


Tuesday, June 18, 2013

Mosaic Madness

Hey guys,

I have an awesome combo for you all today.  I am seriously in love with this mani, I can't even handle it.  Mosaic Madness has the prettiest blue glitter too, I wish had this blue without the black, but I love it with the black too.  Anyways here are the pics....

Colors used:  Pink neon franken (any lighter neon pink will do though) and China Glaze Mosaic Madness


Thursday, June 13, 2013

Frankening Fun

Hey guys,

I have been on a serious neon kick for the past week or so and I was getting tired of the neon colors  I have so I decided to franken some.  I started off with a purple neon from Sally's Girl and I added two of these little bottles to a half full bottle of Sally Hansen Lavender Cloud (a very slightly tinted lavender white), and I thought why not do a whole bunch of pastel like neons!  I bought a couple of bottles of white polish and used neon colors I already owned, with a basic recipe of half a bottle of white and a half a bottle of neon.  I am completely in love with these, some of them remind me of the new China Glaze Sunsational colors and others of the Lime Crime pastel polish but brighter.  Anyways onto the pics, which were a total pain to try and get color accurate but I tried my best.


All the pretties together!


The purple on its own, this one is my absolute favorite, it is less pink toned in real life though


A gradient I did with all of the colors, definitely super hard to capture what these look like in real life though


Tuesday, June 11, 2013

Neon Tribal

Hey guys,

I feel like I haven't posted in forever!  I was without internet for like five days because the line outside my house got cut and I had to wait for the company to come out and repair it.  But it is finally fixed and I have a fun tribal mani for you all today.  I haven't done tribal nails in forever, mainly because they really frustrate me, but I thought I would try it out since it is a fun design for the summer time I think.  Also I don't know if I should do a tutorial on these or not, there are so many out there.  But I basically started with a off-white base then I painted stripes of my neon colors, all three colors once on each nail, and then went in with my black acrylic paint and did the tribal design.  I love how these turned out and I found them easier this time around to do and I actually thought my right hand looked better than my left which is rare so I will post some pics of my never-before-seen right hand! 


Colors used: base, Sally Hansen Lavender Cloud (this is probably discontinued), neon stripes, Nina Ultra Pro Pearly Brights, China Glaze Turned Up Turquoise, and Orly Glowstick.


My usual left hand first


Now for the unseen right hand!


Saturday, June 1, 2013

Black, White, and Neon All Over

Hey guys,

I am in LOVE with this mani.  Nice and bright and summery, I needed something to cheer me up since Oklahoma has been having the worst weather ever lately. I used a bunch of neon colors for this and I did 2 coats of a white base before I applied the neons so that they would really pop.  I think the bright colors look really nice with the black and white glitter too.  I hope you enjoy!


Colors used: Orly Au Champagne (as base), neons from index to pinky Orly Terracotta, China Flip Flop Fantasy frankend with white to make it lighter, Orly Glowstick, and Orly Skinny Dip, Lush Lacquer Salt N Peppa over all of my nails


Monday, May 6, 2013

Tie Dye Nails Tutorial

Hey guys,

I have a tutorial finally!  A couple of weeks ago I posted my Neon Sponging mani and I decided to do a tutorial on it.  I ended up calling them tie dye nails, that is what this technique I think looks like when it is finished and neon sponging was just not such a great name. This is also almost identical to the technique I used for my Thunderstorm Nails the only difference is that in the thunderstorm one I made sure to leave some of my base color showing.  


Products used
Base: OPI My Vampire is Buff
Tie Dye Colors: Color Club Volt of Light, Color Club Pure Energy, and Finger Paints 15 Minutes of Frame
Glitter Top Coat: Is a franken I made with a couple of glitters from Sallys Girl but it is very similar to Sinful Colors Hottie


Step One: You will need 3 different colors, I used neons but any 3 colors will work.  I would recommend colors that will blend together well though. So choosing something like two primary colors and then their secondary color like I did with the yellow, blue and green.  Pink, yellow and orange is another example that would work beautifully.  Next cut up a sponge (really any sponge will work I used the one from my China Glaze Ombre set for this one) make sure the pieces are fairly small so you don't cover your whole nail with one color.  I also would advise using tweezers to hold the sponge since the pieces are so small it makes the job way less messy!

Step Two: Apply a base coat, I just used an off-white for my base because it would really allow the neon colors to pop against it.

Step Three: Begin applying your tie dye colors onto the nail.  As you can see I just pounced the sponge onto random spots on my nails.  Make sure you leave enough room for your other colors!

Step Four: Continue applying your other colors onto the nail, as you can see I made sure to leave enough room to lay down my third color.

Step Five: Finish applying your tie dye colors, you can go back over the colors to get the right opacity and to make sure that none of your base is showing through.  Leave the desing to dry for a minute or two and then top it with a glitter top coat of your choice and then a fast drying top coat over that and you are done!


Friday, April 19, 2013

Neon Sponging

Hey guys,

I am sorry for not posting this past week, I have been under the weather for the past couple of weeks and I am just now starting to feel better. This mani is one that I did about a week ago and am just getting around to posting.  Also there may not be a post for a day because I broke my index fingernail pretty badly and I want to wait a little bit before taking pics.  For this mani I just used my cosmetic sponge to place color onto my nails randomly, very similar to the technique for galaxy nails except for I made sure to get the colors opaque.

Base: Revlon Top Speed Cloud
Sponging Colors: Orly Skinny Dip, Orly Glowstick, and Color Club Electro Candy
Glitter: Sinful Colors Pinky Glitter


Sunday, March 10, 2013

Striping Tape Experiment

Hey guys,

So I made a franken the other day with China Glaze Flip Flop Fantasy.  My Flip Flop Fantasy was getting really low and I decided I would get a new one and just have some fun with the rest of it.  I added white and a little bit of a neon orange and the color turned out gorgeous!  So I did a mani with my franken and the topped it with China Glaze White Cap.  I was bored and decided to play with my striping tape I went with another neon, Nina Ultra Pro Pearly Brights.  Pearly Brights isn't that far off from my franken color so it was nice subtle look (if you call crazy bright coral neon subtle haha).


Friday, January 25, 2013

Party of Five Glitters

Hey guys,

I was craving a bright, glittery mani so I did this one last night.  I used Sinful Colors Bikini, Wet n Wild Party of Five Glitters and inm Northern Lights Holographic topcoat.  Bikini is the most awesome hot pink, almost neon nail polish ever, it is probably my favourite pink out of my whole collection.  I really like this combo it is a nice bright fun mani that makes me happy!


Saturday, January 19, 2013

Pearly Brights

Hey guys,

I grabbed this polish at Sally's the other day and I am in love with it!  It's Nina Ultra Pro Pearly Brights, a gorgeous coral leaning pink neon with shimmer.  I don't know how this one has never caught my eye before.  It is super neon and the color is so lovely.  The formula was really nice on this one, especially for a neon.  I did 3 coats but if you are careful two would be fine.  Also I am sorry for the dry fingers forgot to moisturize before taking pics and I had used acetone to remove my previous mani.


Monday, August 6, 2012

Melting Popsicle Mani

I have seen this done several times. Wah Nails does this design a lot and Let Them Have Polish just did a really cute Nickelodeon inspired mani, which was the main inspiration for mine. 

This is pretty easy to you start with a base color and for your "melting" color you use a dotting tool and draw the drips on then kind of fill it in with the dotting tool.  I will try to post a tutorial on it sometime for you guys.

I used OPI Pink Friday and Color Club Tangerine Scream for the melting color.  I then topped it all with Wet N Wild Hallucinate.


Thursday, August 2, 2012

Pink Glowstick

Fun neon mani today!  I used Orly Glowstick, China Glaze Pink Plumeria, Cover Girl City Lights and some little star glitter pieces from a Dollar Tree set.


Sunday, July 15, 2012

Nails On Fire Gradient

I was just trying something out with this mani.  Seeing what effect I could get by putting a crackle over a gradient.

 For the gradient I used Sally Hansen Complete Salon Manicure Yellow Kitty, Sally's Girl neon orange polish, Essie Bazooka, and the shatter is China Glaze Cracked Medallion over the gradient.


Friday, July 6, 2012

Pink Plumeria

I have a simple mani today. The other day I picked up China Glaze's Pink Plumeria from their summer neon's collection.  This one is interesting indoors it looks like a bright pastel neon coral leaning pink.  Outdoors it lean more neon pink and loses that pastel look that it has indoors.


I tried to get color accurate photos but this one is hard!  It photographs lighter than it is in real life but it isn't darker than traditional neon's imagine this color but not so pastel looking haha.


Sunday, June 24, 2012

Splattered Gradient

Oh my goodness I am sort of obsessed with this mani!  I did a gradient and then splattered over it, the finished look is so cool. 


I did a white base (Orly Dayglow), then sponged with FingerPaints 15 Minutes of Frame, Sinful Colors Why Not, Color Club Pucci-Licious, and an unamed neon pink from Cosmetic Arts.  I then splattered with China Glaze Electric Pineapple.  I alternated which way I applied the gradient on the nail alternating between starting at the cuticle with the pink then flipping the sponge and starting with the green at the cuticle on the next nail.