Showing posts with label pink. Show all posts

Thursday, July 25, 2013

Fan Brush Tie Dye Nail Art

Hey guys,

So I am not really sure what to call these nail at the moment but I am going with fan brush tie dye for right now.  I am in love with this look and it is so simple it is not even funny.  I got the inspiration for this nail design from a dress I had bought for an event at work.  It had a really pretty blue and pink watercolor look in parts of the fabric and it made me want to try for something like it on my nails.  I started with and off-white base and did two coats of that and top coated it.  I let it dry for about ten minutes then I grabbed a pastel neon blue and pink polish, a fan brush and some pure acetone.  I just placed a big drop of the polish color on a paper plate and then I dipped my fan brush into the acetone and thinned out the polish till it got a watercolor look to it.  I then just randomly dapped the thinned polish onto my nails.  I will probably do a more detailed picture tutorial on these soon so I can explain better how I got this look.  I hope you all enjoy!

Colors used: OPI My Vampire is Buff and my past blue and pink neon frankens


Tuesday, July 16, 2013

Floral Nail Art

Hey guys,

So I am super happy today, I just got a new job!  There may not be as many posts coming up since I am starting my new job tomorrow, but I will try and post at least three times a week.  Anyways, today I have some another floral nail art design, I used the same technique as my Hawaiian Style Flowers post.  I love this nail art because it is so easy and requires very little skill to do and it looks really pretty.  Hope you all enjoy.

Colors used:  Orly Pure Porcelain, neon coral, pink and red frankens, Color Club Twiggie, and Orly Lucky Duck


Monday, July 15, 2013

Watermelon Nail Art

Hey guys,

So I tried to do some watermelon nail art the other night, I thought it was going to be much easier to do than it was though.  I first used tape to do the triangle shape and then outlined the entire thing in black but I did not like the finished look.  I removed it and tried out something different on my thumb with less black and added white, I liked it much better so I started on my other nails.  I did not use tape this time, but just used a striping brush to paint out the triangle shape then filled the triangle in.  I added the tips of green, then the stripe of white.  I then outlined the watermelon shape with the black and added some seeds.  It was time consuming but I thought they turned out pretty cute.  Hope you enjoy!


Colors used: Sally Hansen Xtreme Wear Twisted Pink, Orly Green Apple, and white and black striper polish


Friday, July 12, 2013

Hawaiian Style Flowers

Hey guys,

I have a super cute flowers to show you all today, these are really pretty and super easy to do.  I used the tutorial my MrCandiipants to do this mani you can find the video  here. Oh and seriously if you have never watched her videos you need to she is super funny and her nail art is kind of epic!  I hope you enjoy


Colors used: OPI Skull and Glossbones, Revlon Top Speed Violet, my neon purple franken, Revlon Top Speed Luxe Laque, Orly Ancient Jade and Avon Nail Wear Pro Olive Green


Sunday, July 7, 2013

Tutorial: Multi-Colored Water Spotted Nails

Hey guys,

So I did a multi-color water spotted mani a week or two ago and when I posted it on Beautylish someone suggested that I do a tutorial for it.  I thought this was a pretty good idea because I haven't seen any out there for using more than one color in a water spotted mani.  If you have never done a water spotted mani or would like to see a video on how it is done then please visit CutePolish on YouTube.  I hope you all find this helpful!


Colors used: Orly Pure Porcelain, Sally Hansen Xtreme Wear Pacific Blue and Twisted Pink, and Wet N Wild On A Trip


Step One:  Paint your nails a base color, I would suggest a white or off-white for this.  Also apply a little Vaseline or some tape around your fingers to help aid in clean up later.

Step Two: Get a cup a fill it to the top with room temperature water, make sure it is a cup you are not going to be drinking out of again. Oh and do not use a Styrofoam cup the nail polish will melt it! Pick three  colors for your water spots.  Now take one of the colors drip a dot of polish onto the surface of the water.  Spray it with some kind of alcohol based spray about 4-5 inches away (you can use body spray, anti-bacterial spray, hairspray).  I usually spray between 1-3 times, it depends on how well the polish start to separate.

Step Three: Repeat step two with your other two colors.  

Step Four:  Remove the tape or wipe the Vaseline and nail polish off your skin and clean up any other polish with a q-tip or brush and some acetone.  Top coat your look and you should be done!

A couple of tips if you have never done water spotted nails before.
1.It can be a bit tricky to do at first, I find that I like to only work with one drop of polish, especially when doing more than one color for the spots.  I also find that when I do more than one drop it seems to not want to separate once I spray the body spray. 
2. And on the topic of body spray I would highly suggest you do not use aerosol hairspray, I have tried it once and the spray was too powerful it pretty much blew the nail polish out of my cup of water.  
3. It is important that the water you use is room temp, if it is too cold the polish dries very quickly and you will have issues with getting it to spot.


Saturday, July 6, 2013

A Few Random Mani's

Hey guys,

So a have several mani's that I never got around to posting or that I didn't really like how they photographed,  looked etc.  I decided I would do a little spam post for you all with them.  I hope you enjoy!


Watercolor nails with a glitter cross accent, I hated how this one photographed the colors were not showing up well at all


Oklahoma Love mani, I used Gumdrop as the base and acrylic paint for the Oklahoma outline and the heart


Tribal mani, trying to do something inspired by Mr. Candiipants but I totally did not fill in that middle finger very well at all and I didn't see it till I took pics. I used Sinful Colors Bikini and a black striper polish


China Glaze Keep Calm and Paint On with little gems as and accent


Orly Royal Navy, this one is impossible for me to photograph good, it always shows visible nail line and in real life it was not noticeable at all


Orly Rage and Cotton Candy tape mani, I just wasn't sure how much I liked this one, I do love the color combo though


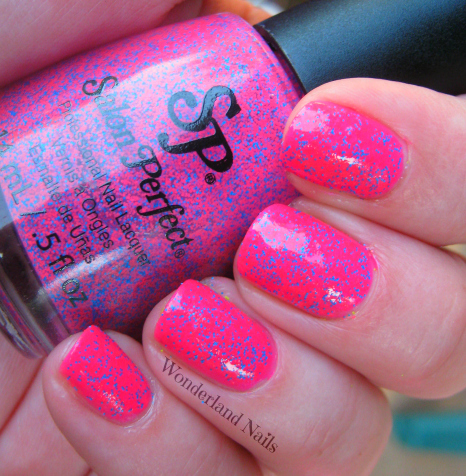
Salon Perfect Shocked over Sinful Colors Bikini, I kept forgetting to post this one and it also is not photographing very color accurate it is a lighter pink


Tuesday, July 2, 2013

Madeline Poole/Pshiiit Inspired Flowers

Hey guys,

So I was browsing Pshiiit's blog the other day and I saw her post about Madeline Poole's nail art book and one of the looks she had done from it.  I instantly knew I wanted to recreate this look, it was just so cute and looked really simple to do.  I didn't have the exact colors that she used but I tried to go with similar ones because I really thought it was a pretty combo.  Also I may do a tutorial on these flowers because they are very simple and look really cute!


Colors used: OPI My Vampire Is Buff, L'Oreal Sparklicious, my neon pink and orange franken, China Glaze White on White and Orly Glowstick


Saturday, June 22, 2013

Multi-Colored Water Spotted

Hey guys,

So when I tried the water spotted nails the other day I thought that it might be cool to see what it would look like if I did a few different colors.  This one was definitely trial and error, I had a hard time getting the color to spot at first and I was trying to use hairspray but it was not working well.  I figured out that if I did just one drop of the nail color onto the water and then sprayed with body spray I got the polish to separate better.  I did one color at a time and I thought it looked pretty cool once I was done with it.


Colors used: base, Orly Pure Porcelain, China Glaze Electric Pineapple, Sinful Colors Why Not and Bikini


Tuesday, June 18, 2013

Mosaic Madness

Hey guys,

I have an awesome combo for you all today.  I am seriously in love with this mani, I can't even handle it.  Mosaic Madness has the prettiest blue glitter too, I wish had this blue without the black, but I love it with the black too.  Anyways here are the pics....

Colors used:  Pink neon franken (any lighter neon pink will do though) and China Glaze Mosaic Madness


Sunday, June 16, 2013

Impressionist/Abstract Flowers Tutorial

Hey guys,

So while updating my blog and changing the name and everything I realized I don not have enough tutorials!  I figured I would start with my abstract/ impressionist flowers that I have done a few times.  These are actually very easy to do and are pretty much mistake proof.  You will need pure acetone, some kind of small glass container to put some acetone in, a small nail art brush, a white or off-white base, three "flowery" colored nail polishes, a green and some topcoat.  

Colors used:  base- Orly Pure Porcelain, flowers- China Glaze Dance Baby & Fuchsia Fanatic, and Sally Hansen Xtreme Wear Coral Reef, leaves- an unnamed Creative Arts green  (dupe to Color Club Twiggie)


Step One: Paint your nails a white or off-white base color and then apply a fast drying topcoat.This is important because we will be using acetone to make the flowers and the topcoat creates a barrier so we don't lift any of the base coat off as we are painting the flowers.

Step Two: Pour some acetone into your glass container and put a drop of one of  your flower colors onto a paper plate.  Dip your nail art brush into the acetone and then mix it into some of the polish you put on the plate, you want the polish to be pretty thinned out by the acetone so you may have to dip the brush back into it a few times to get enough.  Once you mix the polish and acetone begin painting flower like shapes onto your nails.

Step Three:  Continue painting your flowers with the other colors you have chosen, it really doesn't matter if you do perfect looking flower shapes, after the first color I really just kinda haphazardly place the color onto the nail in different spots to balance the look out.

Step Four: Grab your green polish and again thin a blob of it with your acetone and paint it anywhere you have open spaces on the nail.  I would try to avoid overlapping it with the flower colors as much as you can because it can make them look a little muddy. Once you have finished with the leaves you can apply your topcoat.  I like to do the topcoat pretty much right after I am done because it helps to blend the colors even more and gives it a more impressionist style look.

A couple of tips, you should not need very much polish for the flowers and leaves, using the acetone helps because even if the polish gets a bit thick you can still use it since you are thinning it with acetone.  The polish should not be opaque when you are painting the flowers and leaves it should look like watercolors.  If you do feel that you made a mistake you can take your brush and wash it off then dip it into the acetone a lightly brush wear you have messed up and it should take the polish off without removing your base color.

I hope you all like this tutorial and if you have any questions please feel free to leave a comment or e-mail me!


Thursday, June 13, 2013

Frankening Fun

Hey guys,

I have been on a serious neon kick for the past week or so and I was getting tired of the neon colors  I have so I decided to franken some.  I started off with a purple neon from Sally's Girl and I added two of these little bottles to a half full bottle of Sally Hansen Lavender Cloud (a very slightly tinted lavender white), and I thought why not do a whole bunch of pastel like neons!  I bought a couple of bottles of white polish and used neon colors I already owned, with a basic recipe of half a bottle of white and a half a bottle of neon.  I am completely in love with these, some of them remind me of the new China Glaze Sunsational colors and others of the Lime Crime pastel polish but brighter.  Anyways onto the pics, which were a total pain to try and get color accurate but I tried my best.


All the pretties together!


The purple on its own, this one is my absolute favorite, it is less pink toned in real life though


A gradient I did with all of the colors, definitely super hard to capture what these look like in real life though


Tuesday, June 11, 2013

Neon Tribal

Hey guys,

I feel like I haven't posted in forever!  I was without internet for like five days because the line outside my house got cut and I had to wait for the company to come out and repair it.  But it is finally fixed and I have a fun tribal mani for you all today.  I haven't done tribal nails in forever, mainly because they really frustrate me, but I thought I would try it out since it is a fun design for the summer time I think.  Also I don't know if I should do a tutorial on these or not, there are so many out there.  But I basically started with a off-white base then I painted stripes of my neon colors, all three colors once on each nail, and then went in with my black acrylic paint and did the tribal design.  I love how these turned out and I found them easier this time around to do and I actually thought my right hand looked better than my left which is rare so I will post some pics of my never-before-seen right hand! 


Colors used: base, Sally Hansen Lavender Cloud (this is probably discontinued), neon stripes, Nina Ultra Pro Pearly Brights, China Glaze Turned Up Turquoise, and Orly Glowstick.


My usual left hand first


Now for the unseen right hand!


Saturday, June 1, 2013

Black, White, and Neon All Over

Hey guys,

I am in LOVE with this mani.  Nice and bright and summery, I needed something to cheer me up since Oklahoma has been having the worst weather ever lately. I used a bunch of neon colors for this and I did 2 coats of a white base before I applied the neons so that they would really pop.  I think the bright colors look really nice with the black and white glitter too.  I hope you enjoy!


Colors used: Orly Au Champagne (as base), neons from index to pinky Orly Terracotta, China Flip Flop Fantasy frankend with white to make it lighter, Orly Glowstick, and Orly Skinny Dip, Lush Lacquer Salt N Peppa over all of my nails


Tuesday, May 28, 2013

Faded French

Hey guys,

I have a nice twist on a french manicure today.  I have seen some photos of faded french mani's on Pinterest and I have meant to do one for a while now.  Then the other day Nailed It posted a tutorial and it reminded me that I really wanted to try this one out!  The technique for this is the same as any gradient that I do (if you need to check out my tutorial it is here ) although I did way to much white at the tips, so be aware of that when you are doing this.


Colors used: Color Club Get a Clue, Orly Dayglow and OPI I Juggle... Men


Saturday, May 25, 2013

Abstract Flowers

Hey guys,

I have a fun and super easy nail art look today.  I was loosely inspired by some Revlon nail strips I saw the other day at the store.  I started with an off white base color, for the flowers I took the different colors one at a time and mixed acetone with them and painted roundish splotches on my nails.  I plan on doing a tutorial on this one soon, but it really is so easy and mistake-proof!

Colors used:
Base, OPI My Vampire is Buff
Flowers, Sally Hansen Xtreme Wear Pacific Blue and Bubblegum Pink, Sinful Colors Ruby Ruby, Wet N Wild On a Trip
Leaves, Essie Mojito Madness